
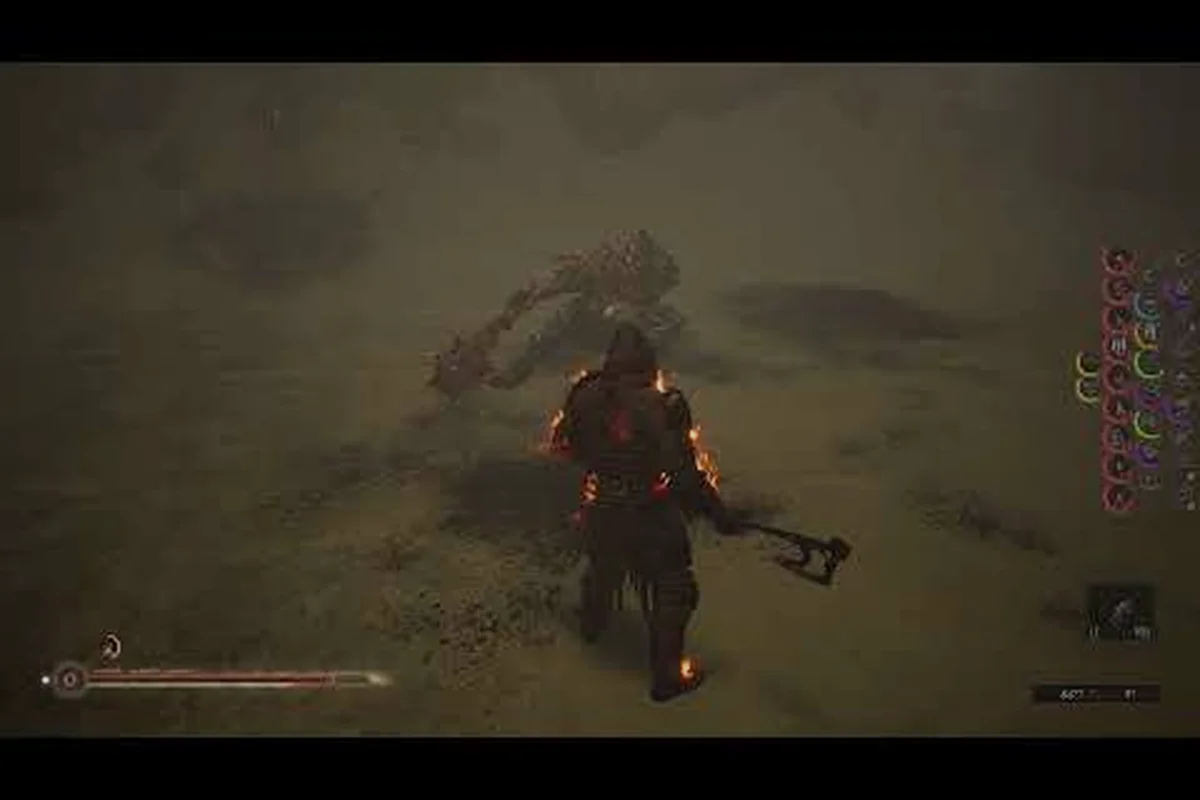
Your Mortal Shell II weapon loadout determines how effectively you shatter enemy posture, punish openings, and survive the Unfound Path. With the Posture system replacing stamina entirely, every melee swing and sidearm shot feeds into a single resource loop: break posture, land a critical Riposte, and reset the cycle. Because combat is unrestricted by stamina, your loadout choices matter more than raw stats — the right pairing turns a sluggish fight into a rhythm you control.
The game launches August 20, 2026 on Steam, PS5, and Xbox Series X|S, and the open beta already revealed how dramatically sidearms shift the pace of encounters. This guide breaks down the best melee and ranged pairings, explains how weapon abilities interact with shell skills, and gives you concrete combos for bosses, dungeons, and stealth approaches. By the end, you will know exactly which Mortal Shell II weapon loadout fits your playstyle and how to upgrade it efficiently.
Understanding the Posture System and Loadout Synergy
The Posture system replaces the traditional stamina bar, and it changes how you build your loadout. Every attack you land chips away at an enemy's posture meter, while blocking, parrying, and using shell abilities also contribute to breaking it. Once posture shatters, you trigger a Riposte Takedown — one of over a dozen brutal executions that deal massive damage and restore resolve. Your loadout must accelerate this loop without leaving you exposed.
Weapon type determines your posture damage per swing, attack speed, and reach. Sidearms add a ranged dimension that lets you chip posture from a safe distance or finish off fleeing enemies. The key insight from beta testing, reported by players on the r/MortalShell subreddit, is that sidearm shots also deal posture damage, which means you can break an enemy's guard before you ever close the distance.
Core Loadout Principles
-
Match speed to shell: Fast shells like Tiel benefit from quick weapons that chain into sidearm shots, while tank shells like Eredrim want heavy hitters that break posture in fewer swings.
-
Posture over raw damage: A weapon that deals 20% less damage but breaks posture 30% faster will clear fights quicker because Riposte Takedowns bypass armor entirely.
-
Sidearm ammo economy: Ranged weapons consume ammunition that refills at checkpoints, so your loadout must balance burst potential with sustainability across the 80+ dungeons.
-
Shell abilities compound: Certain shell skills increase posture damage or refund ammo on critical hits, which changes which weapons become optimal for that shell.
The relationship between melee and ranged weapons is the core of any Mortal Shell II weapon loadout. A heavy greatsword leaves you slow and vulnerable after missed swings, but pairing it with a quick sidearm gives you a safety net. Conversely, a fast sword deals modest posture damage per hit, so a high-damage sidearm becomes your posture-breaker.
Best Melee Weapons for Different Playstyles
Before you can pair sidearms effectively, you need a melee weapon that matches your approach. The open beta showcased a wide range of options, and community testing has identified clear standouts for each playstyle. Your choice here determines your base attack rhythm, so take time to understand the tradeoffs.
Aggressive Pressure Weapons
These weapons excel at maintaining constant pressure and chaining attacks. They break posture through volume rather than single-hit power, and they pair best with sidearms that deal burst damage. This loadout philosophy applies throughout the campaign, since matching your weapons to the situation is the fastest way to break posture and end fights cleanly rather than trading blows.
| Weapon | Posture Damage | Attack Speed | Best Shell | Notes |
|---|---|---|---|---|
| Ashfang Saber | Medium | Very Fast | Tiel | Chains 4-hit combos, low recovery frames |
| Hollowed Khopesh | Medium-High | Fast | Solomon | Heavy finisher breaks posture reliably |
| Twin Fangs | Low-Medium | Fastest | Hadern | Dual-wield, excellent for Harden canceling |
The Ashfang Saber became a beta favorite because its fourth hit in a chain deals bonus posture damage, and you can cancel the recovery into a sidearm shot. Players report that this creates a seamless loop: three quick slashes, a sidearm blast, then a Harden to absorb the counter. The Hollowed Khopesh trades some speed for a devastating heavy finisher that often breaks posture outright, making it ideal for players who prefer a more deliberate rhythm.
Heavy Hitter Weapons
These weapons trade speed for massive posture damage per swing. They require precise timing because missed attacks leave you vulnerable, but the payoff is breaking posture in two or three hits. Adjusting your loadout between regions keeps your damage output relevant as enemies get faster and their posture meters grow with each new area you unlock.
| Weapon | Posture Damage | Attack Speed | Best Shell | Notes |
|---|---|---|---|---|
| Martyr's Greathammer | Very High | Slow | Eredrim | Two hits break most elite posture |
| Gilded Warpick | High | Medium | Eredrim | Charged attack pierces blocking enemies |
| Cinder Maul | High | Slow | Solomon | Fire damage over time adds posture pressure |
The Martyr's Greathammer is the definitive posture-breaker, and Eredrim's durability-focused shell makes the slow recovery manageable. According to community data from the beta, a single charged swing deals enough posture damage to stagger most standard enemies, and two hits break elite guards. The Gilded Warpick offers a middle ground with its medium speed and armor-piercing charged attack, which proves invaluable against shielded enemies that ignore standard attacks.
Balanced Options
For players who want flexibility, balanced weapons offer moderate speed and posture damage. They work with any shell and adapt to any situation, making them excellent choices for first playthroughs. Having a loadout for each scenario means you never enter a fight with the wrong tools for the job, which is the difference between a clean win and a long attrition battle.
-
Hallowed Longsword: The default choice, reliable in every scenario, and its weapon ability grants a temporary damage buff.
-
Bone Scythe: Wide sweeps hit multiple enemies, and the reach keeps you safer against groups.
-
Iron Flail: Unpredictable timing confuses enemy parry attempts, and the charged attack has surprising range.
Your melee choice sets the foundation, but the real power of any Mortal Shell II weapon loadout comes from how you pair it with a sidearm. The ranged weapon you carry fills the gaps in your melee profile and creates combo opportunities that neither weapon could achieve alone.
Top Ranged Sidearms and Their Loadout Roles
Sidearms in Mortal Shell II are not backup tools — they are integral to the combat loop. Each sidearm has a distinct role, from posture chipping to burst damage to utility. Understanding these roles is essential for building an effective Mortal Shell II ranged sidearm guide that covers all scenarios.
Sidearm Categories
| Sidearm | Role | Ammo Efficiency | Best Paired With | Notes |
|---|---|---|---|---|
| Boltcaster | Posture chip | High | Fast melee weapons | Fires quickly, low per-shot damage |
| Hand Cannon | Burst damage | Low | Heavy melee weapons | Massive single shot, long reload |
| Throwing Axes | Utility | Medium | Any melee weapon | Can be retrieved from bodies |
| Arcane Focus | Elemental | Medium | Shell ability builds | Applies elemental effects |
The Boltcaster is the workhorse of Mortal Shell II ranged weapons. Its high fire rate lets you chip posture from a distance, and you can weave shots between melee swings without breaking your rhythm. Players report that the Boltcaster pairs exceptionally well with fast weapons because you can alternate slash-shot-slash-shot, building posture pressure from two angles simultaneously.
The Hand Cannon serves a completely different purpose. Its single shot deals enormous posture damage and can stagger even bosses, but the long reload means you must time it carefully. This sidearm shines with heavy melee weapons because you can open with a cannon blast, close the distance while the enemy recovers, and break their posture with two hammer swings. The combination turns most elite encounters into a three-step sequence.
Utility and Situational Sidearms
-
Throwing Axes are retrievable, which means you never run out of ammo if you collect them after each throw. They deal moderate posture damage and can be thrown while sprinting, making them excellent for hit-and-run tactics.
-
Arcane Focus applies elemental effects that deal damage over time, and the elemental posture pressure continues even while you focus on melee. This sidearm synergizes with shell abilities that boost elemental damage.
-
Grappling Hook is technically a tool rather than a weapon, but it lets you pull enemies toward you, setting up perfect melee combos. Community reports suggest it pairs well with the Martyr's Greathammer because you control engagement distance.
Your sidearm choice should complement your melee weapon's weaknesses. If your melee weapon is slow, choose a fast sidearm for pressure. If your melee weapon lacks reach, choose a sidearm that covers distance. The best Mortal Shell II weapon loadout creates a complete combat profile with no obvious gaps.
Weapon Abilities and Skills That Reshape Your Loadout
Every weapon in Mortal Shell II has a unique weapon ability that consumes resolve, and these abilities can dramatically change how you approach fights. Understanding which abilities synergize with your shell and sidearm is the difference between a functional loadout and an exceptional one.
Signature Weapon Abilities
| Weapon | Ability | Effect | Best Use Case |
|---|---|---|---|
| Ashfang Saber | Ember Dance | Rapid 6-hit flurry, high posture damage | Breaking elite guards quickly |
| Martyr's Greathammer | Sundering Blow | Charged slam, AoE posture damage | Crowd control in dungeons |
| Hallowed Longsword | Sacred Edge | Temporary damage buff, faster swings | Boss fights with long openings |
| Bone Scythe | Harvest | Life steal on next 3 hits | Sustaining through long fights |
The Ember Dance ability on the Ashfang Saber is particularly potent because it deals massive posture damage in a short window, and you can cancel the final recovery into a Boltcaster shot. This creates a devastating combo: Ember Dance to break posture, Riposte Takedown for massive damage, then Boltcaster shots to start building the next break. The Sundering Blow on the Martyr's Greathammer serves a different purpose — its area-of-effect posture damage staggers entire groups, which is invaluable in the cramped dungeon corridors.
Shell Skills That Amplify Weapon Performance
Your shell's skill tree directly affects which weapons and sidearms perform best. The eight playable Shells each have distinct class identities, and their abilities can transform a mediocre weapon into a standout choice. This loadout philosophy applies throughout the campaign, since matching your weapons to the situation is the fastest way to break posture and end fights cleanly rather than trading blows.
-
Tiel's shadow-enhanced dodges let you weave between enemies and create openings for sidearm shots, making fast weapons with quick recovery the optimal pairing.
-
Eredrim's durability focus means you can afford to trade hits, which makes heavy weapons with long recovery frames viable.
-
Solomon's resolve generation fuels weapon abilities more frequently, so weapons with expensive but powerful abilities become more attractive.
-
Hadern's Harden mastery lets you cancel attacks into Harden more effectively, which rewards weapons with multi-hit combos.
The interaction between shell skills and weapon abilities is where advanced loadout optimization happens. For example, if you invest in Solomon's resolve generation skills, you can spam the Ashfang Saber's Ember Dance every few seconds, turning posture breaking into a near-constant state. If you prefer Eredrim's tank approach, the Martyr's Greathammer's Sundering Blow becomes your primary tool because you can absorb counterattacks while the AoE staggers everything nearby.
For a complete breakdown of which shell pairs best with which weapons, check our strongest shell tier list that ranks every combination based on community testing and beta data. Adjusting your loadout between regions keeps your damage output relevant as enemies get faster and their posture meters grow with each new area you unlock.
Optimal Loadout Combinations for Every Scenario
Different encounters demand different loadout configurations. A boss fight requires sustained posture pressure and burst damage, while dungeon exploration demands ammo efficiency and crowd control. Stealth approaches need silent takedowns and quick escapes. Here are the proven combinations for each scenario.
Boss Fight Loadout
Bosses have massive posture meters and long attack chains, so you need sustained pressure and the ability to punish openings. Having a loadout for each scenario means you never enter a fight with the wrong tools for the job, which is the difference between a clean win and a long attrition battle.
-
Primary: Ashfang Saber with Ember Dance ability
-
Sidearm: Hand Cannon for burst posture damage
-
Shell: Solomon for resolve generation
-
Strategy: Build posture with saber combos, use Ember Dance when the boss is recovering, and save the Hand Cannon shot for when the boss is one hit from posture break
This Mortal Shell II weapon loadout maximizes posture damage per second while giving you a burst option for when the boss enters a vulnerable state. According to beta player reports, this combination can break boss posture in under 30 seconds when executed cleanly.
Dungeon Exploration Loadout
Dungeons feature multiple enemies and limited checkpoints, so ammo efficiency and crowd control take priority. This loadout philosophy applies throughout the campaign, since matching your weapons to the situation is the fastest way to break posture and end fights cleanly rather than trading blows.
| Slot | Recommended | Why |
|---|---|---|
| Melee | Bone Scythe | Wide sweeps hit multiple enemies |
| Sidearm | Throwing Axes | Retrievable, infinite ammo |
| Shell | Eredrim | Durability for extended fights |
| Ability | Harvest | Life steal sustains through gauntlets |
The Bone Scythe's Harvest ability keeps your health topped up during extended dungeon runs, and Throwing Axes ensure you never run out of ranged options. Eredrim's durability means you can absorb mistakes without dying, which matters when checkpoints are far apart.
Stealth Loadout
Some encounters reward a stealth approach, letting you thin out enemy groups before engaging the main threat. Adjusting your loadout between regions keeps your damage output relevant as enemies get faster and their posture meters grow with each new area you unlock.
-
Primary: Hollowed Khopesh for silent backstabs
-
Sidearm: Boltcaster with silent shots
-
Shell: Tiel for shadow-enhanced dodges
-
Strategy: Pick off isolated enemies with Boltcaster headshots, then finish with backstabs before the group reacts
The Boltcaster's shots are quiet enough to avoid alerting nearby enemies, and Tiel's dodge lets you reposition quickly between takedowns. This loadout excels at clearing rooms without triggering a full-scale fight. Having a loadout for each scenario means you never enter a fight with the wrong tools for the job, which is the difference between a clean win and a long attrition battle.
Hybrid Loadout for New Game Plus
Once you understand the systems, a hybrid loadout gives you maximum flexibility. This loadout philosophy applies throughout the campaign, since matching your weapons to the situation is the fastest way to break posture and end fights cleanly rather than trading blows.
-
Primary: Gilded Warpick for armor-piercing charged attacks
-
Sidearm: Arcane Focus for elemental pressure
-
Shell: Hadern for Harden canceling
-
Ability: Any, depending on the situation
The Gilded Warpick handles armored enemies, the Arcane Focus applies elemental damage over time, and Hadern's Harden canceling lets you chain attacks safely. This loadout adapts to any encounter, which is why veteran players often settle on it for New Game Plus runs.
For a complete list of every weapon and its upgrade path, see our all weapons guide that covers stats, locations, and upgrade materials. Adjusting your loadout between regions keeps your damage output relevant as enemies get faster and their posture meters grow with each new area you unlock.
Weapon Combos and Advanced Techniques
Mastering weapon combos separates good players from great ones. The Posture system rewards creative sequencing, and the best players chain melee, sidearm, and shell abilities into seamless loops that keep enemies permanently on the defensive. Having a loadout for each scenario means you never enter a fight with the wrong tools for the job, which is the difference between a clean win and a long attrition battle.
Core Combo Sequences
-
Slash-Slash-Shot: Two quick melee attacks, then a sidearm shot. The shot covers the recovery frames of your second attack and adds posture damage from range.
-
Charged Attack into Cannon: Charge a heavy melee attack, then immediately fire the Hand Cannon. The cannon shot lands as the enemy staggers from your melee hit, often breaking posture outright.
-
Harden Cancel Combo: Start a heavy attack, cancel into Harden to absorb the counter, then release the attack and follow with a sidearm shot. This punishes enemies who try to interrupt your windup.
-
Ember Dance into Riposte: Use the Ashfang Saber's Ember Dance to break posture, trigger the Riposte Takedown, then immediately begin a new combo chain on nearby enemies.
Advanced Posture Management
The most advanced players manage posture across multiple enemies simultaneously. By alternating between melee attacks on one enemy and sidearm shots on another, you can break multiple posture meters at once and trigger several Riposte Takedowns in quick succession. This loadout philosophy applies throughout the campaign, since matching your weapons to the situation is the fastest way to break posture and end fights cleanly rather than trading blows.
-
Enemy Group Control: Use the Martyr's Greathammer's Sundering Blow to stagger a group, then pick off individual enemies with Riposte Takedowns while the rest recover.
-
Boss Posture Windows: Learn boss attack patterns to identify when they are vulnerable, then unload your full combo sequence during those windows. The Hand Cannon's long reload means you must time its use for maximum impact.
-
Elemental Stacking: The Arcane Focus applies elemental effects that deal damage over time, and these effects stack with melee posture damage. Apply the elemental effect first, then switch to melee to build posture while the elemental damage chips away.
According to community reports from the open beta, players who master these combo sequences can clear bosses in under two minutes, while players who rely on basic attacks take five minutes or more. The difference is entirely in loadout synergy and combo execution.
For help finding specific weapons to complete your ideal loadout, our weapon find guide covers every weapon location and the upgrade materials you will need. Adjusting your loadout between regions keeps your damage output relevant as enemies get faster and their posture meters grow with each new area you unlock.
Frequently Asked Questions
What is the best Mortal Shell II weapon loadout for beginners?
The Hallowed Longsword paired with the Boltcaster is the most forgiving starter loadout. The longsword offers balanced speed and damage, while the Boltcaster provides safe ranged pressure. This combination works with any shell and teaches you the Posture system without punishing mistakes. Upgrade the longsword first, then invest in Boltcaster ammo capacity.
How do weapon abilities interact with shell skills?
Weapon abilities consume resolve, and shell skills determine how quickly you generate resolve. Solomon's resolve generation skills let you use weapon abilities more frequently, while Tiel's dodge-focused skills create openings for ability usage. The best approach is to read your shell's skill tree and choose weapons whose abilities benefit from your shell's strengths.
Can I use two sidearms in my loadout?
No, you can only equip one sidearm at a time. However, you can switch weapons at checkpoints, so you can carry different sidearms for different sections of a dungeon. Many players keep a Boltcaster for general use and swap to a Hand Cannon before boss encounters.
Do sidearm shots consume posture damage resistance?
Sidearm shots deal posture damage that bypasses enemy resistance, which is why they are so effective against heavily armored enemies. The Gilded Warpick is the only melee weapon that pierces armor, so sidearms are your primary tool against shielded enemies until you acquire it.
What is the best sidearm for stealth approaches?
The Boltcaster is your stealth sidearm—its silent shots drop foes without breaking Posture, ideal for thinning patrols before a melee clash. Pair it with the Martyr’s Blade for heavy executions, or Throwing Axes when you need retrieval. Test both in the beta; adaptation wins.