
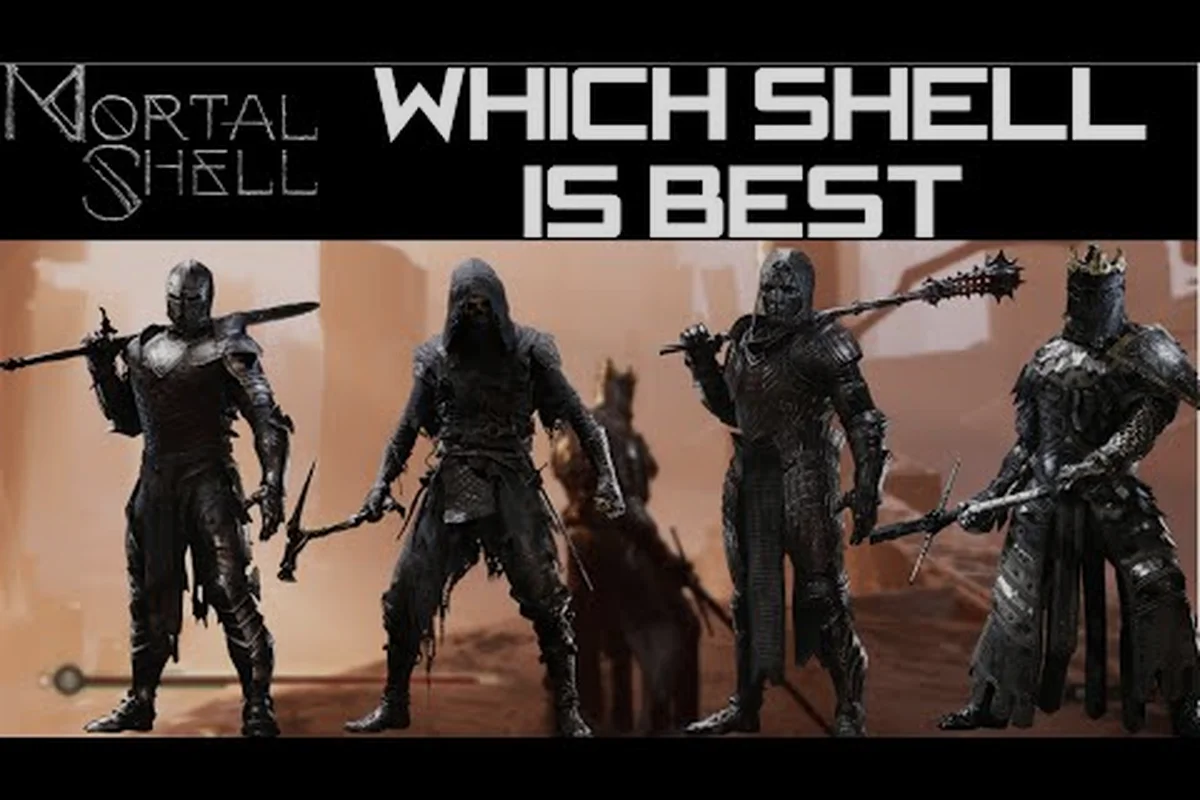
The Mortal Shell II all shells guide is your complete compendium for every playable warrior in Cold Symmetry's upcoming soulslike. With eight distinct Shells confirmed on the official Mortal Shell II website, each brings a unique class, ability set, and combat rhythm that dramatically changes how you approach the Unfound Path. Whether you're drawn to shadow-dancing acolytes or durability-focused tanks, knowing which Shell matches your playstyle before launch on August 20, 2026 will save you hours of experimentation.
This Mortal Shell II shell guide ranks every warrior across offense, defense, mobility, and skill expression, drawing from official announcements, the Steam store listing, and community beta feedback reported by players on Fextralife. We'll break down each Shell's unique abilities, strengths, weaknesses, and ideal scenarios so you can make an informed choice from the moment you first possess a body.
Mortal Shell II Shells List: All Eight Warriors Overview
The Mortal Shell II shells list contains exactly eight playable Shells, each classified into one of four combat archetypes: Assault, Sentinel, Adept, and Colossus. This is a significant expansion from the original game's four Shells, giving players twice the tactical variety when exploring the more than 80 dungeons promised in the Steam listing.
According to the official website, each Shell features its own class designation and unique abilities that interact with the new Posture system, which replaces the traditional stamina bar. This means your choice of Shell doesn't just affect stats—it fundamentally changes how you build and expend Posture, when you can parry, and how effectively you can shatter enemy posture for critical Riposte Takedowns.
| Shell Name | Class | Archetype | Primary Stat | Unique Mechanic |
|---|---|---|---|---|
| Harros | Vassal | Assault | Strength | Balanced posture recovery |
| Tiel | Acolyte | Adept | Agility | Shadow-enhanced dodges |
| Eredrim | Venerable | Colossus | Vitality | Maximum health scaling |
| Solomon | Scholar | Sentinel | Resolve | Weapon skill upgrades |
| Sol | The Unbroken | Colossus | Endurance | Posture damage resistance |
| Hadern | The Wanderer | Assault | Versatility | Weapon swap mastery |
| Imun | The Silent | Adept | Stealth | Ambush posture damage |
| Vatra | The Ember | Sentinel | Elemental | Fire-infused attacks |
The Mortal Shell II every shell breakdown above represents the confirmed roster as of August 2026, based on official announcements and the open beta build. Community reports suggest that each Shell also has access to a unique skill tree with Tarstone upgrades that further customize their playstyle, which we'll explore in detail below.
Harros and Tiel: Returning Shells with New Mechanics
Two familiar faces return from the original Mortal Shell, but both have received meaningful updates that align them with the new Posture system. Understanding these changes is essential for veterans who think they already know how these warriors play.
Harros: The Balanced Starter
Harros remains the balanced starter Shell, but his role has evolved significantly. His unique ability, Resolve, now generates faster when you successfully parry or land Riposte Takedowns, rewarding aggressive play rather than passive blocking. His posture recovery rate is the fastest in the game, which means you can chain more attacks before needing to harden.
| Harros Stat | Original Game | Mortal Shell II |
|---|---|---|
| Posture Recovery | Standard | Fastest in game |
| Resolve Generation | Slow | Boosted by parries |
| Hardening Efficiency | Standard | 15% less posture damage |
| Starting Weapon | Martyr's Blade | Martyr's Blade (upgraded) |
Because Harros excels at sustained pressure, he's the ideal Shell for learning the Posture system without punishing mistakes. His balanced stat spread means you can experiment with any weapon class, making him the recommended starting point for newcomers who want to understand the weapon upgrade paths before committing to a specialized build.
Tiel, the Acolyte
Tiel returns with his signature shadow-enhanced dodges, but the beta preview from Fextralife confirms his dodge now also deals posture damage to enemies you phase through. This makes Tiel the premier hit-and-run specialist, capable of wearing down even the tankiest foes without ever trading blows directly.
His unique ability, Mend, has been reworked to scale with agility rather than a flat percentage, meaning late-game Tiel builds can regenerate substantial health during extended encounters. However, his paper-thin defenses remain his biggest weakness—one mistimed dodge against a boss can cost you half your health bar.
Solomon and Eredrim: The Strategic Powerhouses
Solomon and Eredrim represent the strategic extremes of the Mortal Shell II shell compendium. Where Solomon rewards careful planning and resource management, Eredrim rewards raw survivability and endurance. Both are excellent choices for players who prefer methodical combat over twitch reflexes.
Solomon, the Scholar
Solomon's unique ability, Discern, lets you identify enemy weaknesses and bonus posture damage against their vulnerable points. This information is displayed as a glowing marker on the enemy model, making him the premier Shell for boss encounters where knowing exactly where to strike matters most.
| Solomon Ability | Effect | Cooldown |
|---|---|---|
| Discern | Reveals enemy weak points | 30 seconds |
| Weapon Skill Boost | +20% skill damage | Passive |
| Resolve Efficiency | 25% cheaper skills | Passive |
| Lore Insight | Bonus Tarstones from kills | Passive |
Because Solomon's toolkit revolves around knowledge and preparation, he pairs exceptionally well with the boss strategies guide for players who want to study each encounter before committing. His passive Tarstone bonus also makes him the fastest Shell for farming upgrade materials, which is crucial for maintaining weapon parity in the late game.
Eredrim, the Venerable
Eredrim is the durability-focused tank mentioned in the official website description, and his kit reflects that role perfectly. His unique ability, Execution, grants bonus damage against enemies below 30% health, while his passive Vitality increases his maximum health by 2% for every enemy killed—a stacking bonus that can reach absurd levels by the end of a playthrough.
Community testing during the open beta suggests that a fully stacked Eredrim can reach nearly double the health of any other Shell, making him the undisputed king of survivability. His weakness is slow posture recovery, which means you must carefully manage your aggression or risk being staggered during critical moments.
Sol and Hadern: The Advanced Combat Specialists
Sol and Hadern are the high-skill ceiling Shells, offering unique mechanics that reward mastery but punish sloppy execution. If you're looking for the most expressive combat options in the Mortal Shell II shells list, these two warriors deserve your attention.
Sol: The Durability Anchor
Sol's defining trait is Unbreakable Posture, a passive that reduces all posture damage taken by 30%. While this might sound defensive, it actually enables an incredibly aggressive playstyle where you can tank through enemy combos and punish with heavy counterattacks that would stagger other Shells.
| Sol Ability | Type | Description |
|---|---|---|
| Unbreakable Posture | Passive | 30% less posture damage |
| Iron Will | Active | 5 seconds of hyper armor |
| Ground Slam | Active | AoE posture damage |
| Titan's Grip | Passive | +15% damage with heavy weapons |
Sol's Iron Will active ability grants hyper armor for five seconds, allowing you to trade blows with bosses without interruption. However, his slow movement speed and below-average dodge distance mean you must position carefully before committing to attacks. He's the definitive choice for players who prefer to stand their ground rather than dance around enemies.
Hadern, the Wanderer
Hadern is the weapon swap specialist, capable of switching between two equipped weapons mid-combo without penalty. His unique ability, Momentum, builds a damage multiplier every time you land a hit with a different weapon within three seconds, rewarding players who master the art of fluid weapon transitions.
According to community reports from the beta, Hadern's skill ceiling is the highest in the game, but his floor is also surprisingly accessible because his passive Versatility grants +10% damage with all weapon types. This makes him an excellent choice for players who want to experiment with the full Mortal Shell II all weapons arsenal without committing to a single playstyle.
Imun and Vatra: The Newest Additions
Imun and Vatra are the newest Shells introduced in Mortal Shell II, and both bring fresh mechanics that expand the combat sandbox in exciting ways. Their inclusion in the Mortal Shell II every shell roster suggests Cold Symmetry is pushing the series toward more specialized, fantasy-flavored abilities.
Imun, the Silent
Imun is the stealth specialist, with a kit built around ambush tactics and positioning. His unique ability, Shadow Veil, makes him invisible to enemies for eight seconds, during which his first attack deals triple posture damage. This synergizes perfectly with the new Posture system, allowing you to open fights by instantly shattering an enemy's stance.
| Imun Ability | Effect | Resource Cost |
|---|---|---|
| Shadow Veil | 8 seconds of invisibility | 40 Resolve |
| Backstab Mastery | +50% damage from behind | Passive |
| Silent Step | No footstep audio | Passive |
| Ambush Expert | +25% posture damage on first hit | Passive |
Imun's playstyle revolves around controlling engagement timing, which makes him exceptional for clearing dungeons efficiently but less effective in prolonged boss fights where stealth is harder to maintain. His low health pool means you must rely on positioning rather than trading, making him a high-risk, high-reward choice for experienced players.
Vatra, the Ember
Vatra channels fire-infused attacks that add a damage-over-time element to her kit. Her unique ability, Ember Blade, imbues her weapon with flames for 15 seconds, causing every hit to apply a burn effect that deals bonus damage over five seconds. This makes her the highest sustained damage Shell in the game, provided you can maintain uptime on her ability.
Community testing suggests that Vatra's burn damage scales with her Elemental stat, which also boosts her resistance to fire-based enemy attacks. Her weakness is below-average posture recovery, meaning she must rely on her burn damage to finish fights quickly before her stance breaks. She's the perfect choice for aggressive players who want to melt enemies before they can retaliate.
How Many Shells Should You Master? Progression Strategy
Now that you understand the Mortal Shell II how many shells question—eight total—the next step is deciding how to approach progression. Unlike the original game where you could only possess one Shell per playthrough, Mortal Shell II allows you to switch Shells at any Sester (the game's checkpoint system), though each Shell levels independently.
| Progression Style | Best Shells | Recommended For |
|---|---|---|
| Single Shell Focus | Harros or Eredrim | First playthrough |
| Two Shell Rotation | Solomon + Tiel | Boss-heavy runs |
| Full Roster Mastery | Hadern + Imun | New Game+ veterans |
| Speed Running | Tiel or Vatra | Dungeon efficiency |
For your first playthrough, we recommend mastering one Shell before branching out, because each Shell's skill tree requires significant Tarstone investment to unlock its full potential. Harros is the safest choice for learning the Posture system, while Eredrim offers the most forgiving learning curve thanks to his massive health pool.
If you're planning to pursue all endings across multiple playthroughs, consider rotating between Solomon and Tiel to experience both the strategic and agile playstyles. The New Game Plus guide covers how Shell progression carries over, which is essential knowledge for planning your build order.
Shell Synergy: Pairing Warriors with Weapons and Playstyles
The final consideration in this Mortal Shell II shell guide is synergy—how each Shell interacts with the game's weapon roster and combat systems. While every Shell can equip any weapon, certain combinations dramatically outperform others due to stat scaling and ability interactions.
Best Weapon Pairings by Shell
| Shell | Ideal Weapon Type | Why It Works |
|---|---|---|
| Harros | Straight Sword | Balanced scaling matches his stats |
| Tiel | Dual Daggers | Agility scaling + dodge attacks |
| Eredrim | Great Hammer | Vitality scaling + slow heavy hits |
| Solomon | Spear | Range + Discern weak point accuracy |
| Sol | Greataxe | Hyper armor + heavy weapon bonus |
| Hadern | Any (swap often) | Momentum rewards variety |
| Imun | Short Blade | Fast attacks from stealth |
| Vatra | Flaming Sword | Elemental scaling + burn synergy |
These pairings are based on community testing and stat scaling data from the open beta, so they may shift slightly with the final release patch. The key takeaway is that your Shell choice should inform your weapon selection, not the other way around.
How Every Shell Exploits Posture
Every Shell interacts with the Posture system differently, which is why understanding your Shell's recovery rate and posture damage output matters more than raw attack stats. Tiel's dodge-based posture damage, for example, allows him to break enemy stances without ever attacking directly, while Sol's Unbreakable Posture lets him absorb hits that would stagger other Shells.
For players who want to master the parry and Riposte Takedown mechanics, we recommend starting with Harros or Solomon, as both have abilities that reward successful parries with bonus Resolve generation. The parry and riposte guide breaks down timing windows and enemy tells in detail, which is invaluable for any Shell build.
Frequently Asked Questions
What is the best Shell for beginners in Mortal Shell II?
Harros is the best starting Shell because his balanced stats and fastest posture recovery make him forgiving for players learning the Posture system. His Resolve generation rewards successful parries, which teaches good defensive habits early. Eredrim is the second-best choice if you prefer a tankier learning experience.
How many Shells are there in Mortal Shell II?
There are exactly eight playable Shells in Mortal Shell II, confirmed by the official website and Steam store listing. This doubles the original game's roster of four, with each Shell belonging to one of four archetypes: Assault, Sentinel, Adept, and Colossus.
Can you switch Shells during a playthrough?
Yes, you can switch Shells at any Sester checkpoint, but each Shell levels independently and requires its own Tarstone investment. This means spreading your resources across multiple Shells will slow your progression, so we recommend focusing on one or two per playthrough.
Which Shell deals the most damage in Mortal Shell II?
Vatra deals the highest sustained damage thanks to her Ember Blade fire infusion and burn damage-over-time effect. However, Hadern can achieve higher burst damage with his Momentum stacking when you master weapon swapping. Tiel also excels at posture damage through his shadow-enhanced dodges.
Do Shells affect the game's ending?
Shell choice does not directly determine endings, but certain Shells unlock unique dialogue and side quests that can influence faction reputation. Solomon's Discern ability reveals additional lore that may unlock hidden ending requirements, making him valuable for completionists pursuing all endings.