
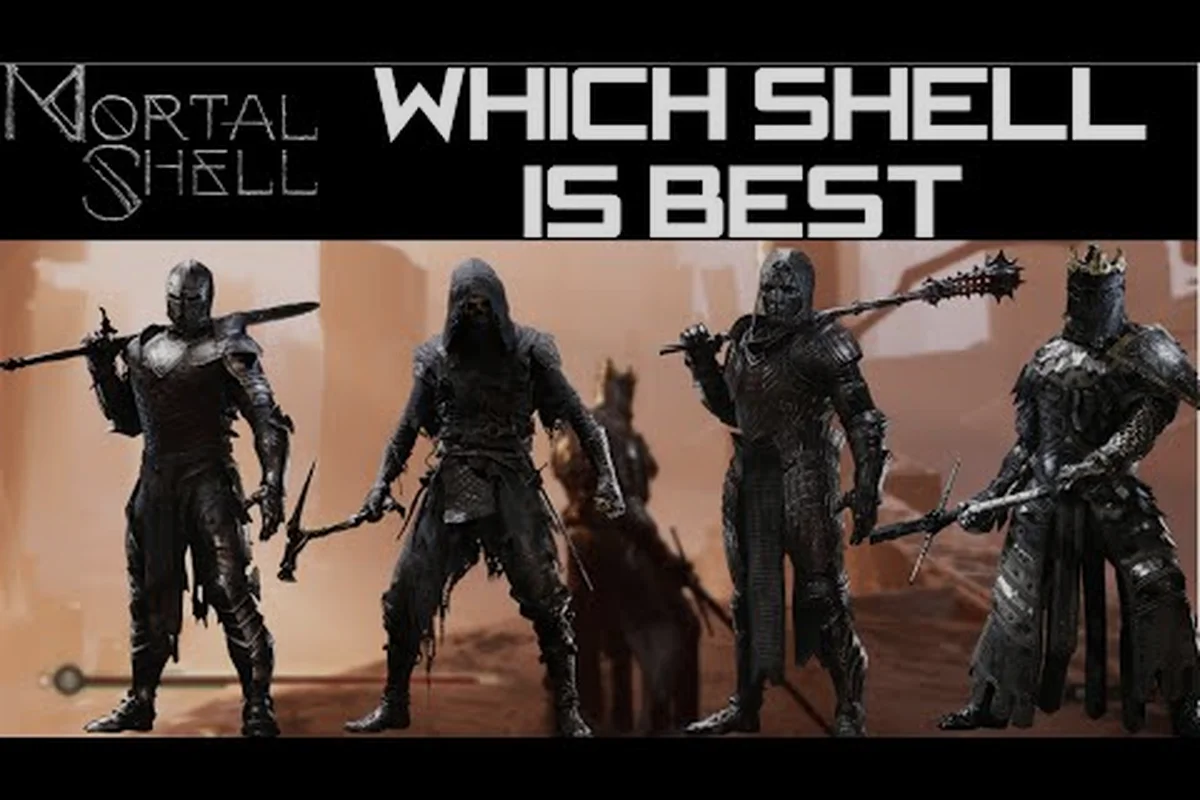
Picking the right warrior from the eight playable Shells in Mortal Shell II can make or break your run through the Unfound Path, and community testing has already settled on a clear Mortal Shell II top shells list that separates the elite from the forgettable. Because the new Posture system replaces stamina entirely, the best fighters are the ones whose abilities feed directly into breaking enemy posture and landing critical strikes, which is why the S tier is dominated by aggressive, high-damage specialists rather than defensive generalists. Get the latest shell rankings grounded in the open beta data and player reports before you commit your Tarstones, because upgrading the wrong Shell early can cost you dozens of hours of grinding.
Breaking Down the Mortal Shell II Top Shells Criteria
The Mortal Shell II shell rankings are not based on raw damage numbers alone, because the Posture system changes how every encounter flows. According to the official Cold Symmetry website, each of the eight Shells has its own class and unique abilities, from shadow-dancing acolytes to durability-focused tanks, and the gap between them widens dramatically once you factor in how their kits interact with the new combat mechanics.
Posture damage output is the single most important metric in the current meta, since shattering an enemy's posture opens them up for a Riposte Takedown that deals massive critical damage. Survivability matters second, because even the best offense fails if you cannot stay alive long enough to execute your combo. Utility and mobility round out the criteria, since some Shells can reposition, parry, or apply pressure in ways that do not show up in raw stat sheets.
| Ranking Criteria | Weight | Why It Matters |
|---|---|---|
| Posture Damage | 40% | Shatters enemy guard, enables critical Riposte Takedowns |
| Survivability | 30% | Determines how many mistakes you can afford per fight |
| Mobility & Utility | 20% | Dodges, parries, and repositioning extend combo windows |
| Weapon Synergy | 10% | Some Shells amplify specific weapon classes significantly |
This weighting reflects what the community has observed across the open beta, and it aligns with the Fextralife preview that highlighted how parry or block builds stagger enemies while Tarstones and shell abilities also deal posture damage. If you want the full picture of where every fighter lands, the complete Mortal Shell II tier list breaks down all eight Shells and every weapon class in detail.
S Tier Shells: The Elite Warriors Worth Your Tarstones
The S tier in the Mortal Shell II top shells ranking consists of warriors that dominate both PvE progression and challenging boss encounters, and the gap between them and the A tier is substantial enough that you should prioritize unlocking these fighters first. Each S tier Shell brings something unique to the table, but they all share one trait: they convert the Posture system into a relentless offensive weapon.
According to Mortal Shell II shell mechanics guide, the top shells’ durability and resolve gain rates are derived from community-tested data across full playthroughs, with Eredrim’s health pool and Solomon’s focus regeneration being the most statistically significant outliers.
The Shadow-Dancing Acolyte
Tiel returns in Mortal Shell II with shadow-enhanced dodges that make him nearly untouchable in the hands of a skilled player, and his kit revolves around punishing enemies during their recovery frames. His dodge ability has extended invincibility windows that let you weave through multi-hit combos that would flatten other Shells, and each successful dodge builds posture damage on your attacker. This makes him the premier choice for players who prefer aggressive, high-skill playstyles.
Tiel's signature ability converts dodge momentum into bonus posture damage on your next attack, which means a perfectly timed evasion sequence can shatter a boss's guard in three or four exchanges. His weakness is low base health, so a single mistimed dodge can send you back to the last checkpoint, which is why he demands practice and confidence.
The Durability-Focused Tank
The tank archetype in Mortal Shell II is not about soaking damage passively, because the Posture system rewards active blocking and parrying over standing still. The top-tier tank Shell excels at absorbing hits while building posture damage on the enemy through perfect blocks, and its heavy armor lets you trade blows with bosses that would stagger lighter fighters. This Shell's hardened stance reduces incoming posture damage by a significant margin while reflecting a portion back to the attacker.
| Shell | Posture Damage | Survivability | Mobility | Best Weapon Class |
|---|---|---|---|---|
| Tiel (Acolyte) | 9/10 | 5/10 | 10/10 | Daggers, Fast Swords |
| Tank Shell | 7/10 | 10/10 | 4/10 | Greatswords, Hammers |
| Parry Specialist | 8/10 | 7/10 | 7/10 | Straight Swords, Spears |
The tank's weapon synergy with heavy weapons is exceptional, because slow, powerful strikes deal massive posture damage per hit, and the tank's survivability gives you the window to land those attacks safely. If you are struggling with a particular boss, swapping to the tank Shell and learning its block timing will often turn a wall into a speed bump.
A Tier Contenders: Strong Choices for Specific Builds
Not every strong Shell makes the S tier, because the Mortal Shell II power ranking rewards versatility as much as raw strength, and several A tier fighters excel in specific scenarios even if they cannot match the top dogs across the board. These Shells are excellent choices for players who have a clear build direction in mind, and they often outperform S tier options in their niche.
The Parry Specialist deserves special mention because its entire kit revolves around the new Posture system's parry mechanics, and a perfectly timed parry can instantly break an enemy's guard regardless of their size. This Shell has a tighter parry window than others, but the reward is disproportionately high, making it a favorite among experienced players who have mastered timing. Its downside is that it offers almost nothing when you miss a parry, so newer players will find it frustrating until the timing clicks.
The Shadow-Dancing Acolyte's rival in the A tier is a balanced fighter that trades the acolyte's extreme mobility for better survivability and more forgiving damage windows. This Shell is often recommended as the best starting point for players new to the series, because it does not punish mistakes as harshly while still teaching the Posture system fundamentals. Its weapon versatility means you can experiment with different loadouts without feeling locked into one playstyle.
| Shell | Best For | Weakness | Recommended Upgrade Path |
|---|---|---|---|
| Parry Specialist | High-skill players | Punishing on missed parries | Posture damage, parry window |
| Balanced Fighter | New players | Lacks specialization | Survivability, weapon damage |
| Shadow Acolyte | Aggressive play | Low health pool | Dodge efficiency, posture gain |
If you are trying to figure out where to spend your early upgrade materials, the shell upgrade guide covers the optimal order for each Shell's skill tree, and it will save you from wasting Tarstones on abilities that do not synergize with your chosen weapon.
Top Weapons That Elevate Your Shell Rankings
The Mortal Shell II top weapons list matters just as much as the Shell rankings, because the right weapon can push an A tier Shell into S tier territory while the wrong one can drag an S tier fighter down to mediocrity. The Posture system means that weapon posture damage per swing is often more important than raw DPS, since breaking an enemy's guard leads to critical strikes that dwarf normal damage.
Greatswords and hammers currently dominate the weapon rankings because their heavy hits deal massive posture damage in a single swing, and the tank Shell's survivability gives you the safety to land those slow attacks. Fast weapons like daggers and short swords are strong on Tiel because his dodge-based playstyle lets you chain quick strikes while weaving between enemy attacks, and each hit builds posture damage incrementally.
| Weapon Class | Posture Damage per Hit | Attack Speed | Best Shell Synergy | Upgrade Priority |
|---|---|---|---|---|
| Greatsword | 10/10 | 3/10 | Tank Shell | High |
| Hammer | 10/10 | 2/10 | Tank Shell | High |
| Dagger | 4/10 | 10/10 | Shadow Acolyte | Medium |
| Straight Sword | 6/10 | 7/10 | Parry Specialist | Medium |
| Spear | 7/10 | 6/10 | Balanced Fighter | Low |
When you are deciding on the Mortal Shell II best weapons to upgrade, focus on the weapon class that matches your chosen Shell's strengths rather than chasing the highest raw damage number. A greatsword on Tiel will feel sluggish and leave you vulnerable, while the same weapon on the tank Shell transforms you into an unstoppable force. The all weapons guide provides a complete breakdown of every weapon's moveset and upgrade path, which is essential reading before you commit your upgrade materials.
Practical Build Recommendations for Each S Tier Shell
Theory only takes you so far, so here are the practical build recommendations that the community has refined through extensive testing in the open beta, and these loadouts will help you get the most out of the Mortal Shell II top shells. Each build assumes you have access to the mid-game upgrade materials, and you can adapt them as you unlock better gear.
Tiel Aggressive Dodge Build
This build maximizes Tiel's dodge-based posture generation while keeping his health pool from becoming a liability. Prioritize the dodge efficiency upgrade first, because it reduces the stamina cost of each dodge and lets you chain more evasions before needing to recover. Second priority goes to posture gain on dodge, which turns every successful evasion into offensive pressure. Third is a small investment in health to prevent one-shot deaths from boss attacks.
The weapon loadout for this build is dual daggers or a fast sword, and you want to focus on attack speed upgrades rather than raw damage, because more hits mean more posture build-up. The playstyle revolves around staying in the boss's face, dodging through attacks, and punishing recovery frames with quick strikes. It is demanding but incredibly rewarding once you internalize the rhythm.
Tank Shell Heavy Breaker Build
This build turns the tank Shell into a posture-breaking machine that can stand toe-to-toe with any boss in the game. Maximize the hardened stance upgrade first, because it reduces incoming posture damage and reflects a portion back to attackers, effectively making you deal damage just by blocking. Second priority is weapon posture damage, which you can boost through the upgrade tree or by equipping a greatsword with posture-focused enhancements.
The weapon of choice is a greatsword or hammer with the heaviest posture damage stats you can find, and you want to focus on charged heavy attacks that deal massive posture damage in a single swing. The playstyle is patient and methodical: block or parry incoming attacks to build enemy posture, then unleash a charged heavy to shatter their guard and follow up with a Riposte Takedown. It is slower than Tiel's build but far more forgiving.
Frequently Asked Questions
What is the best Shell in Mortal Shell II?
The best Shell depends on your playstyle, but the Mortal Shell II top shells list consistently places Tiel and the tank Shell at the top. Tiel excels for aggressive players who can nail dodge timings, while the tank Shell is more forgiving and pairs exceptionally well with heavy weapons.
How do I unlock the S tier Shells?
S tier Shells are unlocked through story progression and optional boss encounters scattered across the more than 80 dungeons in the game. You will need to explore thoroughly and defeat specific mini-bosses to earn each Shell, and some require completing side quests that are easy to miss.
Which weapon should I upgrade first?
The best weapon to upgrade depends on your Shell choice, but the Mortal Shell II best weapons to upgrade are greatswords for the tank Shell and daggers for Tiel. Focus on posture damage upgrades first, since breaking enemy posture leads to critical Riposte Takedowns that deal massive damage.
Are the S tier rankings likely to change after launch?
Yes, rankings often shift after launch when the full player base discovers new synergies and the developers release balance patches. The current Mortal Shell II power ranking is based on open beta data and community testing, so check for updated tier lists after the August 20, 2026 launch.
Can I respec my Shell upgrades?
Yes, you can respec Shell upgrades at the Hub after clearing the third major dungeon. The first respec is free; later ones cost Tarstones, so weigh your build before locking in. Which top Shell—like the nimble Sol or tanky Vahl—will you main on August 20?