
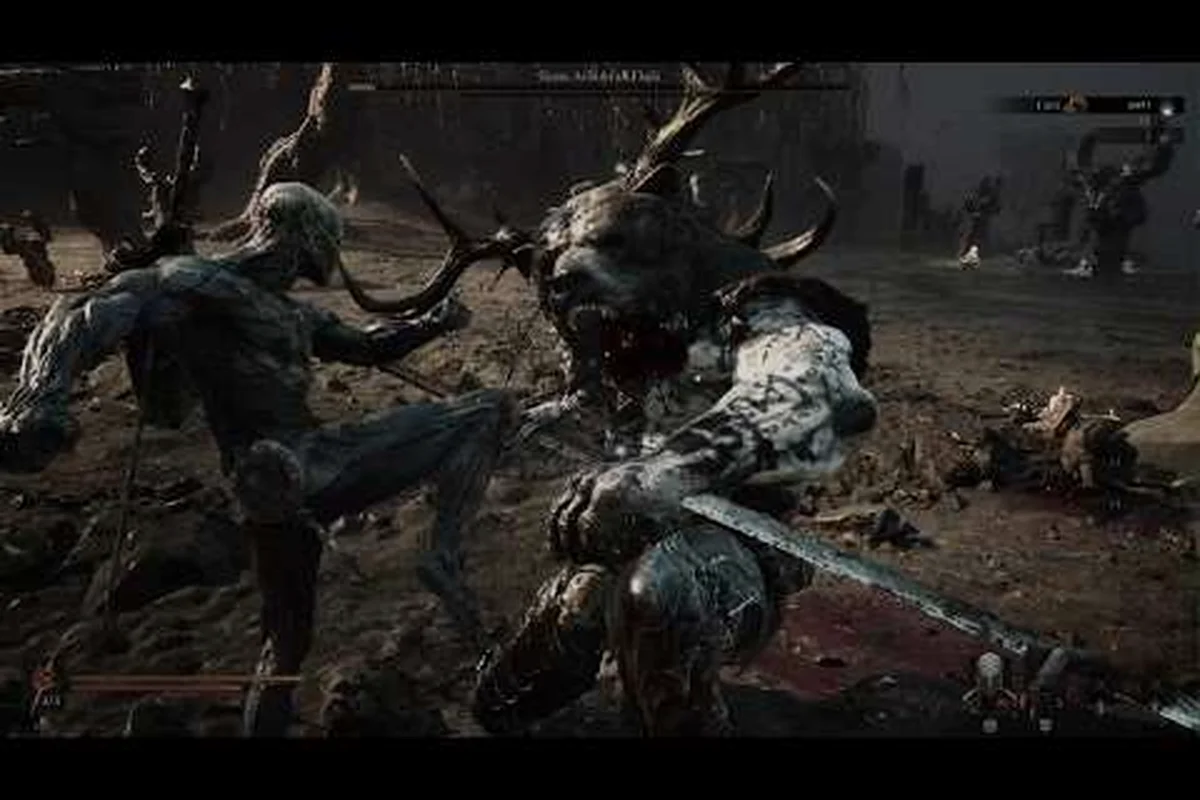
Getting cornered by three enemies at once in Fallgrim's ruins is the fastest way to lose a Shell in Mortal Shell II, and the game's new Posture system makes the old panic-roll strategy from the first game actively dangerous. Because stamina no longer limits your actions, the real resource you manage is enemy posture and your own positioning, which means Mortal Shell II multi enemy combat demands a completely different mental model than the original. This guide breaks down the crowd control tactics that turn hopeless gang-ups into manageable fights, covering spacing rules, Harden timing, stealth thinning, sidearm usage, and the finisher economy that keeps you alive.
Why Multi Enemy Combat Works Differently in Mortal Shell II
The shift from the first game's stamina bar to the Posture system changes everything about how you approach groups. In the original Mortal Shell, you could kite enemies until their attacks exhausted their stamina, then punish with a heavy weapon swing. According to the official Steam page, combat in Mortal Shell II is now unrestricted by stamina, so both you and your enemies can attack continuously until posture breaks. This creates a much faster, more aggressive flow where Mortal Shell II combat vs Mortal Shell feels like night and day.
When you face three or more enemies, the old strategy of waiting for an opening no longer works because enemies never tire themselves out. Instead, you must create openings by shattering enemy posture through parries, blocks, and specific shell abilities. Community reports from the open beta, summarized by Fextralife's preview, indicate that the Posture system rewards aggressive, calculated play rather than passive waiting.
Here is what changes when you fight groups:
-
No stamina means no natural pauses — enemies chain attacks indefinitely, so you must force pauses through posture breaks.
-
Parry or block builds stagger — a well-timed parry against one enemy creates a brief window where others hesitate, giving you breathing room.
-
Riposte Takedowns deliver over a dozen brutal executions — these finishers not only kill a target but also grant temporary invulnerability frames, which is crucial when surrounded.
-
Positioning matters more than ever — because you cannot out-wait enemies, you must control the space they occupy.
The core takeaway is that Mortal Shell II button mashing punished players who try to trade hits with groups. Every swing you commit leaves you vulnerable to the enemies you are not targeting, so you need a deliberate approach that prioritizes posture damage over raw damage output.
The Spacing Triangle: Positioning Rules for Groups
Before you worry about parries and finishers, you need to master the spacing triangle — the fundamental positioning framework for Mortal Shell II multi enemy combat. This concept comes from analyzing how enemy AI behaves in groups, and it applies to every encounter with three or more hostiles.
The triangle works like this: you always want to position yourself so that enemies approach from a single direction rather than surrounding you. Because enemy AI in Mortal Shell II tends to path directly toward the player, you can manipulate their movement by backpedaling in a wide arc while keeping all enemies in your field of view. This naturally funnels them into a line, which lets you fight them one at a time even though they are all present.
| Positioning Error | What Happens | Correct Adjustment |
|---|---|---|
| Standing still in an open area | Enemies surround you from all sides | Keep moving in a wide circle to maintain a single approach vector |
| Backing into a wall | You get cornered with no escape route | Always keep an escape path behind you, even if it means taking a wider route |
| Fighting in narrow corridors | Enemies stack and block your camera view | Pull enemies back into open ground before engaging |
| Dodging sideways into other enemies | You roll into a second group's aggro range | Dodge diagonally backward, never perpendicular to the group |
The most important rule is never let enemies split your attention. When you face a group, your camera should always show every hostile on screen. If an enemy moves off-screen, you have lost track of it, and that is when you eat a hit from behind. Community data from the beta suggests that enemies will attempt to flank you if you focus on one target for too long, so you need to rotate your camera constantly while fighting.
Using Terrain to Your Advantage
Terrain is your best friend in Mortal Shell II multi enemy combat. Narrow doorways, chokepoints, and elevated ledges all create natural funnels that reduce a group of five enemies to a single-file line. When you enter a room with multiple hostiles, backpedal toward the nearest doorway and hold your ground there. This limits how many enemies can attack you simultaneously, which effectively turns a 1v5 fight into a series of 1v1 fights.
Elevated positions work differently but just as effectively. If you stand on a ledge or platform, enemies must climb or jump to reach you, and their climbing animations leave them completely vulnerable to attacks. You can charge a heavy attack and release it as they crest the ledge, instantly breaking their posture and setting up a finisher. This tactic works especially well against slower enemies like the Brutes, who take several seconds to climb.
Harden Timing: The Group Combat Lifesaver
Harden remains your most powerful defensive tool in Mortal Shell II, but its usage changes dramatically when you face groups. In the first game, you could harden reactively to block a single incoming attack. In Mortal Shell II multi enemy combat, you must pre-harden before committing to attacks, because you cannot react to three enemies swinging at different timings.
The key insight is that Harden now serves as an offensive tool as much as a defensive one. Because you can attack while hardened, you can initiate a heavy swing, harden mid-animation, and absorb the counterattacks from surrounding enemies while your weapon connects. This trades your Harden cooldown for guaranteed posture damage on your primary target, which is an excellent trade when you are outnumbered.
Here is the Harden timing framework for group fights: These principles apply to almost every group encounter in the game, from roaming patrols to dungeon ambushes, so they are worth internalizing early before the difficulty ramps up. The key is to control the engagement rather than let the group control you, which is why spacing and target selection matter so much when the odds are stacked against you.
-
Pre-harden for heavy attacks — activate Harden before starting a heavy swing so you absorb any interrupts during the wind-up.
-
Harden after a parry — when you parry one enemy, immediately harden to block the follow-up attacks from others.
-
Harden during finisher recovery — after a Riposte Takedown, harden immediately to cover the recovery animation.
-
Save Harden for escape — if you need to retreat and heal, harden, then sprint away while the enemies are stuck attacking your hardened body.
Harden vs. Dodge in Group Scenarios
Many players default to dodging in group fights because it feels safer, but the dodge i-frames in Mortal Shell II are shorter than in the original game, according to community testing. Dodging also moves you out of position, which can break your spacing triangle and expose you to attacks from new angles. Harden, by contrast, keeps you rooted in place, preserving your positioning while negating damage.
| Defensive Option | Best Used When | Risk Level |
|---|---|---|
| Harden | Committing to an attack, absorbing multi-hit combos | Low — preserves position, but locks you in place |
| Dodge | Avoiding telegraphed heavy attacks, repositioning | Medium — i-frames are short, and you may roll into danger |
| Block | Facing a single enemy with predictable timing | Medium — posture damage builds quickly against groups |
| Parry | Fighting one-on-one or when you can isolate a target | High — mistimed parries leave you wide open |
The general rule is Harden for groups, dodge for singles. When you face three or more enemies, Harden gives you the best risk-to-reward ratio because it does not disrupt your positioning. For more detail on i-frame timing and dodge windows, check our dodge guide which breaks down the exact frames for each Shell class.
Stealth Thinning: Reducing the Herd Before the Fight
The best crowd control tactic in Mortal Shell II is not fighting the crowd at all. Stealth thinning — the practice of eliminating enemies one by one before they aggro — is the single most effective way to handle groups, and it is dramatically more viable in Mortal Shell II than in the original game. Because the game features more verticality and environmental cover, you can often pick off half a group before the rest even notice you.
The stealth system in Mortal Shell II rewards patience. When you approach an enemy from behind without being detected, you can perform a stealth kill that instantly eliminates the target without triggering combat. The trick is that enemies have individual awareness ranges, and killing one does not automatically alert its nearby allies if they are far enough away or if their line of sight is blocked.
Here is the stealth thinning process that works consistently: Practicing these patterns in the opening areas builds the habits you will need once groups start arriving with elites mixed in and sidearm ammo becomes precious. These principles apply to almost every group encounter in the game, from roaming patrols to dungeon ambushes, so they are worth internalizing early before the difficulty ramps up.
-
Survey the group from a distance — use the camera to identify which enemies are isolated and which are clustered together.
-
Kill the outliers first — take out enemies at the edges of the group, where their death will not be noticed immediately.
-
Use throwing sidearms to lure — throw a projectile to create noise in a specific direction, pulling one enemy away from the group.
-
Retreat and reset — after each kill, back off and wait for the alert state to fade before moving in for the next target.
-
Only engage the remainder head-on — once you have reduced a group of five to two, you can fight the survivors with normal combat tactics.
The sidearm system is essential for stealth thinning. Every Shell can equip a ranged weapon, and these are not just for damage — they are noise-making tools that let you manipulate enemy positions. According to the Steam page, sidearms are powerful enough to be viable in direct combat, but their real value in group encounters is the ability to split aggro.
Sidearm Loadouts for Crowd Control
Not all sidearms are created equal when it comes to group management. Based on community reports from the beta, here is how the sidearm types compare for crowd control scenarios: The key is to control the engagement rather than let the group control you, which is why spacing and target selection matter so much when the odds are stacked against you.
| Sidearm Type | Crowd Control Role | Ammo Efficiency | Best Shell Synergy |
|---|---|---|---|
| Ballistazooka | Heavy single-target damage to break posture of a priority target | Low — use sparingly | Harros for damage bonuses |
| Hammer and Chisel | Thrown projectile that staggers on impact, interrupting attacks | Medium | Tiel for stealth approaches |
| Hand Cannon | Wide blast that damages multiple enemies in a cone | Medium | Solomon for group damage |
| Crossbow | Silent single-target shot that does not alert nearby enemies | High | Tiel for stealth thinning |
The Crossbow is the standout choice for stealth thinning because its silent shots do not trigger alert states in nearby enemies. You can stand at range, pick off enemies one by one, and the rest of the group will not react until they physically see a corpse. This makes it possible to reduce a group of six enemies to two without ever entering combat, which completely changes the difficulty of the encounter.
Finishers and Tarstones: The Group Fight Economy
Once combat does break out, your primary goal is to generate finisher opportunities because Riposte Takedowns are the most efficient way to thin a group. Each finisher removes one enemy from the fight permanently, and the invulnerability frames during the animation protect you from the remaining hostiles. This creates a positive feedback loop: break posture, execute a finisher, use the i-frames to reposition, then break the next enemy's posture.
The Posture system rewards targeted aggression — focusing all your attacks on a single enemy until their posture breaks is far more effective than spreading damage across the group. When an enemy's posture breaks, they enter a staggered state that lasts several seconds, giving you time to move into position for a finisher. The finisher itself deals massive damage and typically kills the target outright, which is why Mortal Shell II finishers are the backbone of group combat.
Here is the finisher economy you should aim for in every group fight: Practicing these patterns in the opening areas builds the habits you will need once groups start arriving with elites mixed in and sidearm ammo becomes precious. These principles apply to almost every group encounter in the game, from roaming patrols to dungeon ambushes, so they are worth internalizing early before the difficulty ramps up.
-
Focus one enemy at a time — spread damage across the group means no one staggers, and you get no finishers.
-
Use posture-damage abilities on priority targets — shell abilities and tarstones that deal posture damage accelerate the stagger process.
-
Chain finishers for breathing room — each finisher's i-frames give you time to assess the remaining enemies and plan your next move.
-
Prioritize dangerous enemies first — archers and casters should be your first finisher targets because they disrupt your positioning from range.
Tarstone Loadouts for Multi Enemy Encounters
Mortal Shell II tarstones are socketable gems that modify your shell's abilities, and certain combinations are dramatically better for group fights. Based on community testing from the beta, here are the tarstone setups that excel in multi enemy combat: The key is to control the engagement rather than let the group control you, which is why spacing and target selection matter so much when the odds are stacked against you.
| Tarstone | Effect | Group Combat Value |
|---|---|---|
| Posture Shard | Increases posture damage dealt by 15% | High — faster staggers mean more finishers |
| Harden Echo | Reduces Harden cooldown by 20% | High — more frequent Harden uses in extended fights |
| Executioner's Mark | Restores health on finisher kills | Critical — sustains you through long group encounters |
| Aggro Veil | Reduces enemy detection range by 30% | Medium — helps with stealth thinning approaches |
| Stagger Bloom | Increases stagger duration on posture breaks | Medium — longer windows to position finishers |
The Executioner's Mark tarstone is arguably the most important for group combat because it converts finishers into healing. In a fight against five enemies, you will perform at least three finishers, and each one restoring health effectively negates the chip damage you take while breaking posture. This lets you outlast groups that would otherwise wear you down through attrition.
For more detail on how shell abilities interact with the Posture system, our shell abilities combat guide covers the full ability tree and which skills synergize with group fighting. Additionally, understanding the broader combat system will help you see how posture damage, parrying, and finishers fit into the complete picture.
Advanced Group Tactics: Luring, Splitting, and Priority Targeting
Once you have mastered the basics of spacing, Harden timing, stealth thinning, and finisher economy, you can start using advanced group tactics that give you even more control over engagements. These tactics come from experienced players who spent extensive time in the open beta, and they represent the difference between surviving group fights and dominating them.
The first advanced tactic is luring with sidearm noise. Instead of using sidearms purely for damage, you can fire a shot at a wall or floor near a group to create a noise that attracts only some of the enemies. This splits the group into smaller clusters that you can handle separately. The key is to aim the shot so that it is equidistant between two enemies — this causes both to investigate, but they will arrive at different times, letting you fight them one at a time.
The second tactic is positional resetting. If a group fight starts going badly, you do not have to commit to it. You can sprint away, break line of sight, and wait for the enemies to return to their patrol positions. When you re-engage, they will not have the same aggro state, and you can use stealth thinning to reduce their numbers before the fight restarts. This is especially effective in dungeons where you can duck around corners and through doorways.
The third tactic is priority targeting based on enemy type. Not all enemies in a group are equally dangerous, and eliminating the right ones first makes the entire fight easier: Practicing these patterns in the opening areas builds the habits you will need once groups start arriving with elites mixed in and sidearm ammo becomes precious.
-
Archers and casters — these enemies attack from range and force you to split your attention. Kill them first.
-
Fast melee enemies — they close distance quickly and interrupt your attacks. Kill them second.
-
Slow heavy enemies — they deal massive damage but are easy to dodge. Kill them last.
-
Shield bearers — they block your attacks and protect other enemies. Parry their attacks to break their guard.
Shell-Specific Group Combat Strategies
Different Shells handle groups differently, and choosing the right Shell for your playstyle matters. According to the official website, Mortal Shell II features eight playable Shells, each with its own class and unique abilities, from shadow-dancing acolytes to durability-focused tanks. Here is how the main Shell archetypes approach multi enemy combat:
| Shell Archetype | Group Combat Strength | Recommended Approach |
|---|---|---|
| Tiel (Shadow Dancer) | Exceptional mobility and stealth | Use stealth thinning aggressively, dodge through groups, focus on backstab finishers |
| Harros (Veteran) | Balanced stats with weapon skill bonuses | Reliable all-rounder, use Harden liberally, break posture with heavy weapons |
| Solomon (Scholar) | Strong resolve and ability synergy | Use shell abilities to deal posture damage, parry frequently, manage cooldowns |
| Tank Archetypes | High durability and stagger resistance | Absorb hits, trade blows, use Harden to create openings for heavy attacks |
Tiel is the standout for group combat because his shadow-enhanced dodges let him weave through groups without taking hits, and his stealth bonuses make thinning far more effective. If you prefer a more direct approach, tank archetypes can simply outlast groups by absorbing damage and using Harden to create openings. For a full breakdown of which Shell suits different combat styles, our build guide offers detailed recommendations based on your preferred approach.
Frequently Asked Questions
What is the best way to handle multiple enemies in Mortal Shell II?
The most effective approach combines stealth thinning with spacing control. Use a crossbow to eliminate isolated enemies before combat starts, then funnel the remaining group through a chokepoint. Focus posture damage on one enemy at a time to generate finisher opportunities, which remove threats permanently and grant invulnerability frames.
How does Mortal Shell II combat differ from the original Mortal Shell?
The biggest difference is the Posture system replacing stamina. In the original, you could wait for enemies to exhaust themselves; in Mortal Shell II, enemies attack indefinitely until their posture breaks. This makes Mortal Shell II multi enemy combat more aggressive and requires active engagement through parries, blocks, and posture-damaging abilities rather than passive waiting.
Is button mashing viable for group fights in Mortal Shell II?
No, Mortal Shell II button mashing punished severely. Unplanned attacks leave you vulnerable to enemies you are not targeting, and the Posture system rewards deliberate, focused aggression. You need to manage Harden timing, maintain spacing, and prioritize one enemy at a time to generate finishers. Random swinging will get you surrounded and killed quickly.
What tarstones should I use for multi enemy encounters?
The Executioner's Mark tarstone is essential because it restores health on finisher kills, sustaining you through extended fights. Pair it with Posture Shard for faster staggers and Harden Echo for more frequent defensive options. This combination maximizes your finisher economy and keeps you alive during prolonged group engagements.
How do I break enemy posture when fighting multiple enemies?
Focus one target relentlessly while Harden absorbs the others’ hits. Parry only when you’ve separated an enemy, and land a stagger finisher for i-frames to reset. Use shell abilities like Martyr’s Blessing to chip posture across a cluster, then chain executions.