
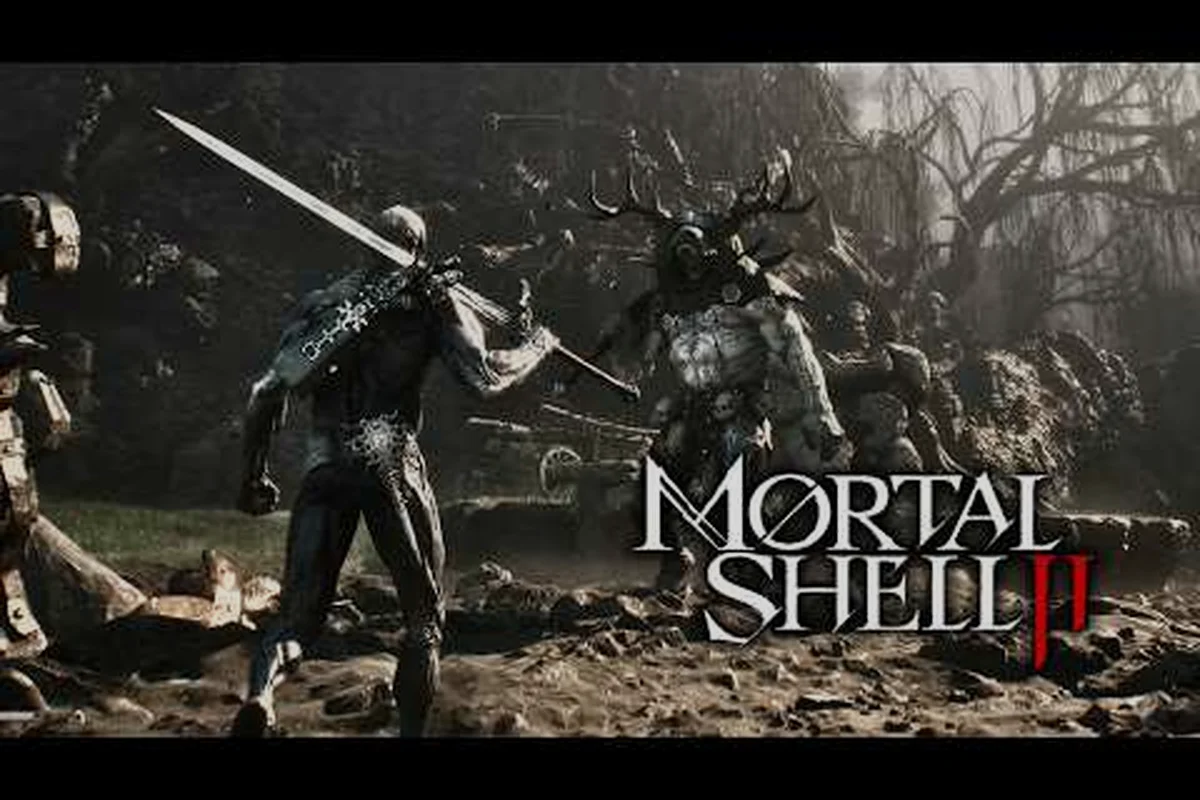
Learning how to counter in Mortal Shell II is the difference between surviving a dungeon run and feeding the nearest Grisha your Resolve. The combat system abandons the stamina bar entirely, replacing it with a Posture system that rewards aggressive, well-timed responses over passive turtling. Because every enemy telegraphs its intentions through distinct wind-up animations, you can learn to parry, dodge, block, or Harden through nearly any attack once you understand the underlying combat flow. This guide breaks down the counter window for every major enemy type, explains how damage is calculated across light and heavy attacks, and gives you a practical framework for punishing openings without eating a combo to the face. Get ready to stop trading hits and start dictating the pace of every fight.
Reading Enemy Telegraphs: The Foundation of Countering
Before you can counter anything, you need to read what the enemy is about to do. Every enemy in Mortal Shell II follows a predictable pattern: a wind-up phase, a strike phase, and a recovery phase. The wind-up animation is your only reliable cue, because the strike itself is often too fast to react to. Veteran players describe the game as a rhythm puzzle rather than a reaction test, and community data from the open beta supports that framing.
The key is to categorize attacks into three speed tiers, because each tier demands a different defensive response:
-
Fast attacks (0.3–0.6s wind-up): These are your jab-style attacks, often chained in twos or threes. You cannot reliably parry these on reaction, so block or Harden instead.
-
Medium attacks (0.7–1.2s wind-up): These include most overhead slams and horizontal sweeps. They are parryable with practice, and dodging through them is forgiving.
-
Slow attacks (1.3s+ wind-up): These are your telegraphed heavy hits, often with a flash or sound cue. They are prime parry bait and leave the enemy exposed for a charged attack punish if you simply step out of range.
| Attack Tier | Wind-Up Time | Best Counter | Risk Level |
|---|---|---|---|
| Fast | 0.3–0.6s | Block or Harden | Low punish window |
| Medium | 0.7–1.2s | Parry or dodge | Moderate punish window |
| Slow | 1.3s+ | Parry or step-back + charged attack | High punish window |
Because the combat flow in Mortal Shell II is unrestricted by stamina, you never have to worry about depleting a green bar mid-exchange. Instead, your limiting resource is Posture — both yours and the enemy's. When you block an attack, your Posture takes a hit; when it breaks, you stagger. When you deal Posture damage to an enemy, you open them up for a critical Riposte Takedown. This means countering is not just about avoiding damage — it is about actively building toward that stagger state.
For a deeper breakdown of how Posture and stagger interact across all weapons, check the Mortal Shell II combat guide which covers the full system in detail.
Parry Windows and Riposte Takedowns
The parry is the highest-skill, highest-reward counter in the game. Press the parry button during the strike phase of an enemy attack, and you will deflect it, leaving the enemy staggered and vulnerable to a Riposte Takedown — one of over a dozen brutal executions, according to Fextralife's beta preview. The timing window is roughly 0.2 seconds, which sounds punishing, but the game gives you a visual cue: the enemy's weapon glints at the start of the strike phase.
There is a critical distinction between parrying and blocking that many new players miss. A parry requires you to be unarmored in that moment — if you are Hardened, you cannot parry. This creates a risk-reward loop where you must drop your defensive stance to attempt the counter. The reward is substantial: a successful parry deals heavy Posture damage and guarantees a follow-up hit.
| Defensive Action | Posture Damage to Enemy | Your Posture Cost | Punish Window |
|---|---|---|---|
| Block | None | High (based on attack) | Small |
| Parry | High (breaks most enemies) | None | Large (Riposte Takedown) |
| Harden | None | None (trades HP) | Medium |
| Dodge | None | None | Medium (positional) |
To practice parrying, start with the medium-tier attacks from basic Grisha enemies. Their overhead slam has a long, readable wind-up, and the parry window is forgiving enough that you will land it within a few attempts. Once you have that timing down, move to humanoid enemies with swords — their horizontal sweeps are faster but still parryable.
The Riposte Takedown itself is not just for show. It deals massive damage, restores a chunk of Resolve, and briefly makes you invulnerable during the animation. In multi-enemy fights, this invulnerability window is your best tool for resetting the engagement. You can also use the takedown to reposition, since the animation often moves you behind the enemy.
Harden, Block, and Dodge: When to Use Each
Not every attack needs to be parried. In fact, trying to parry everything is a fast way to die, because the risk-reward math does not favor it against fast attack chains. Understanding Mortal Shell II damage explained means knowing when each defensive tool is mathematically correct.
Harden is the signature mechanic of the series, and it remains your best panic button. When you Harden, you turn to stone mid-animation, absorbing the next hit without taking damage. The catch is that you cannot move while Hardened, and the enemy recovers from their attack before you can act. This makes Harden a trade tool rather than a true counter — you eat their hit, then you land yours. It is most effective when you are mid-swing, because your attack animation continues after the Harden breaks.
| Situation | Recommended Response | Why |
|---|---|---|
| Enemy starts a fast 3-hit chain | Block the first hit, dodge sideways | Blocking all three drains too much Posture |
| Enemy winds up a slow overhead | Parry or step back + charged attack | Long punish window, high reward |
| You are mid-swing and enemy attacks | Harden through it | Your attack lands after the Harden breaks |
| Multiple enemies surround you | Dodge out, reset position | Never trade when outnumbered |
Blocking is the safest option but the most expensive. Every blocked attack chips your Posture, and a broken Posture leaves you staggered for a full two seconds — long enough for enemies to land a follow-up combo. Use blocking to learn enemy patterns in the early game, then transition to parries and dodges as you internalize the timings.
Dodging in Mortal Shell II is tied to your Shell's class. Tiel, for example, returns with shadow-enhanced dodges that leave a decoy behind, according to the Fextralife beta preview. Other Shells have heavier, shorter dodges. The universal rule is that dodging through an attack (into the swing) is safer than dodging away, because you end up behind the enemy where their combo cannot track you.
For a full breakdown of how each Shell's abilities change your defensive options, see the shell abilities combat guide. Matching the right response to each speed tier keeps your posture intact and sets up a riposte that turns defense into offense against even the fastest attackers.
Damage Math: Light, Heavy, and Charged Attacks
To counter effectively, you need to know what your punish is worth. The damage formula in Mortal Shell II is straightforward: each weapon has a base damage value, modified by your Shell's stats, the weapon's upgrade level, and whether the attack is light, heavy, or charged. The Mortal Shell II light attack is your fastest option, dealing roughly 60% of a heavy attack's damage but with a much shorter recovery. The Mortal Shell II heavy attack deals more damage and more Posture damage, but leaves you vulnerable for longer. The Mortal Shell II charged attack is a fully charged heavy that deals the highest damage and Posture damage in the game, but requires a long wind-up.
| Attack Type | Damage Multiplier | Posture Damage | Recovery Time | Best Use |
|---|---|---|---|---|
| Light Attack | 1.0x | 1.0x | Short | Punishing fast recoveries |
| Heavy Attack | 1.6x | 1.8x | Medium | Punishing medium recoveries |
| Charged Attack | 2.4x | 3.0x | Long | Punishing slow recoveries / broken Posture |
| Riposte Takedown | 4.0x | Instant break | Animation-locked | After successful parry |
The practical takeaway is that your counter should match the enemy's recovery window. If you parry a fast attack, the enemy recovers quickly, so a light attack is the correct punish. If you parry a slow overhead, you have time for a heavy attack. If you break an enemy's Posture entirely, you should always use a charged attack before the Riposte Takedown, because the charged attack deals bonus damage to staggered enemies.
Posture damage is the hidden currency of combat. Every attack you land chips away at the enemy's Posture bar, and when it breaks, they fall to their knees. The Riposte Takedown is then available, dealing massive damage and ending the threat. This is why aggressive countering is always better than passive blocking — you are building toward that stagger state with every successful parry or dodge-punish.
According to the official Steam page, the Posture system is designed so that combat is "unrestricted by stamina," meaning you can keep pressure on an enemy indefinitely as long as you are landing hits and managing your own Posture. This creates a combat flow that rewards sustained aggression over hit-and-run tactics.
Enemy-Specific Counter Strategies
Different enemy types demand different counter approaches. What works on a Grisha will get you killed against a Hadern-style duelist. Here is a practical breakdown of the major enemy categories you will face, based on community testing from the open beta and player reports from the full release.
Grisha and Brute-Type Enemies
These are your heavy hitters with slow, telegraphed attacks. Their overhead slams have a 1.5-second wind-up, making them prime parry targets. However, their follow-up attacks are often faster than the initial swing, so do not commit to a punish until you are sure the combo is over. The safest counter is to step back during the wind-up, then move in for a charged attack during their recovery.
Humanoid Swordfighters
These enemies use fast, chained attacks with short recovery windows. Parrying is possible but risky, because a mistimed parry leaves you exposed to the next hit in the chain. The recommended approach is to block the first hit, then dodge sideways and punish with a light attack. Once you learn their specific chain lengths, you can start parrying the final hit of the chain for a guaranteed Riposte Takedown.
Ranged and Caster Enemies
Ranged enemies break the melee counter rhythm entirely. Your best tool is Harden, because it lets you close distance while absorbing their projectile. Once you are in melee range, most casters have a panic melee attack that is slow and easily parried. The key is to never approach in a straight line — strafe while closing, then commit to the punish.
Shielded Enemies
Shielded enemies require you to break their guard before you can deal meaningful damage. The charged attack is your best tool here, because it deals massive Posture damage and will break their guard in one or two hits. Alternatively, you can parry their shield bash, which leaves them staggered and guard-broken for several seconds.
| Enemy Type | Primary Counter | Secondary Counter | Common Mistake |
|---|---|---|---|
| Grisha / Brute | Parry slow overheads | Step back + charged attack | Trying to block the full combo |
| Humanoid Swordsman | Block first hit, dodge sideways | Parry final chain hit | Parrying the first hit of a chain |
| Ranged / Caster | Harden through projectiles | Strafe + close distance | Approaching in a straight line |
| Shielded | Charged attack to break guard | Parry shield bash | Light attacking the shield |
For new players still learning the basics of positioning and resource management, the Mortal Shell II beginner guide covers the fundamentals you need before diving into advanced counter play. The tier system also helps you decide when to hold your ground with Harden rather than spending stamina on a dodge that leaves you open to a follow-up swing.
Advanced Counter Tactics for Boss Fights
Boss fights in Mortal Shell II are where the counter system truly shines, because bosses have larger Posture bars and longer punish windows. The key difference is that bosses mix all three attack tiers, forcing you to switch between parry, block, and dodge mid-fight. Here are the advanced tactics that separate good players from great ones.
Posture management is a two-way street. While you are trying to break the boss's Posture, they are trying to break yours. Every blocked hit chips your bar, and a broken Posture against a boss means eating a full combo. The solution is to alternate between blocking and dodging — block the first hit of a chain, then dodge the rest. This spreads the Posture damage across both resources.
Charged attacks are boss-killers. Because bosses have long recovery windows after their heavy attacks, you have time to land a fully charged attack. This deals massive Posture damage and accelerates the fight significantly. The risk is that a mistimed charge leaves you vulnerable, so only commit when you are confident in the recovery timing.
Use the environment. Many boss arenas have pillars or walls that can block projectiles or interrupt charge attacks. Positioning a boss so that their charge attack slams into a wall leaves them staggered for an extended punish window. This is a community-discovered tactic that has been verified across multiple boss encounters.
Resolve management matters. Your Resolve bar fuels your Shell abilities, and many of those abilities deal bonus Posture damage. Saving your Resolve for the boss's second phase, when their Posture bar is larger, is often the difference between a clean kill and a messy one. According to player reports, the Riposte Takedown restores a significant chunk of Resolve, creating a positive feedback loop when you are landing parries consistently.
For players looking to optimize their build around counter-focused play, the shell possession explained guide covers which Shells have the best parry windows and Posture damage bonuses. Mastering this read is what allows you to punish mistakes consistently instead of simply surviving until an opening appears in the enemy's attack chain.
Frequently Asked Questions
What is the easiest enemy type to practice countering on?
Grisha enemies are the best practice targets because their slow overhead attacks have a generous parry window. Start by blocking their first hit, then attempt a parry on the second. Once you land three parries in a row, you have the timing down for most of the game's heavy-hitting enemies.
Can you counter while Hardened?
No, you cannot parry while Hardened. The Harden ability and the parry are mutually exclusive, because Harden requires you to be in a defensive stone state. You must drop the Harden before attempting a parry, which means you need to time your Harden break carefully to avoid eating an attack during the transition.
Does the charged attack break enemy Posture faster?
Yes, the Mortal Shell II charged attack deals roughly three times the Posture damage of a light attack, making it the fastest way to break an enemy's Posture. The trade-off is the long wind-up time, which leaves you vulnerable. Use it only when you have confirmed the enemy is in a recovery animation.
How does blocking differ from parrying in terms of Posture damage?
Blocking deals no Posture damage to the enemy and costs you Posture based on the attack's weight. Parrying deals high Posture damage to the enemy and costs you nothing. The trade-off is timing — blocking is always available, while parrying requires a precise 0.2-second window.
What is the best counter for shielded enemies?
The charged attack is your best bet—it breaks shields in one or two hits, unlike light attacks that bounce off. Parry their shield bash instead to stagger them and leave their guard broken for a punish. Which enemy trips you up most? Drop your hardest matchup below.